White Chocolate Raspberry Scones

Raspberry White Chocolate SconesHellooooo!!

It’s been a while!

I’ve been trying to think of an uber cool reason to explain the lack of posts, but the truth is it’s been super cold in Melbourne and the only thing I’ve been wanting to do during any free time is curl up in my warm sofa and watch reruns of the Gilmore Girls  (I still think Rory should have ended up with Jess!).
SONY DSCAnyway, after much deliberation and coaxing from the silly ubiquitous Bubblybaker voices, I finally found the motivation to step into that cold, tiled kitchen to make fluffy white chocolate and raspberry scones – to have with my cup of tea while watching Season 3 (again) of the Gilmore Girls of course (fyi that’s the season where Jess comes to Stars Hollow – my fave! *sighs of content* :P).
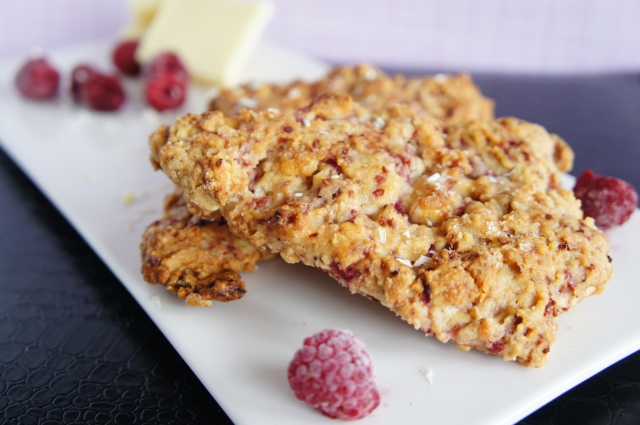
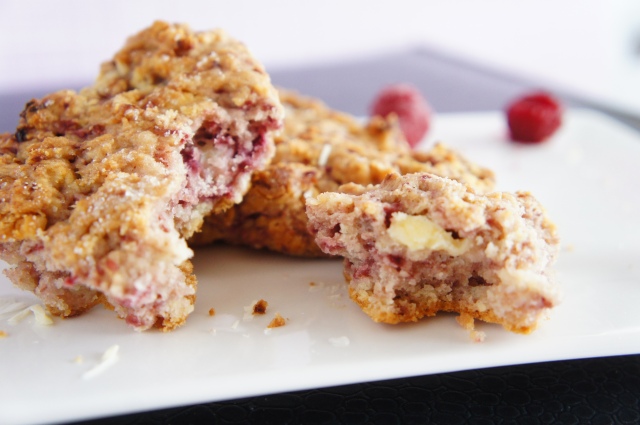
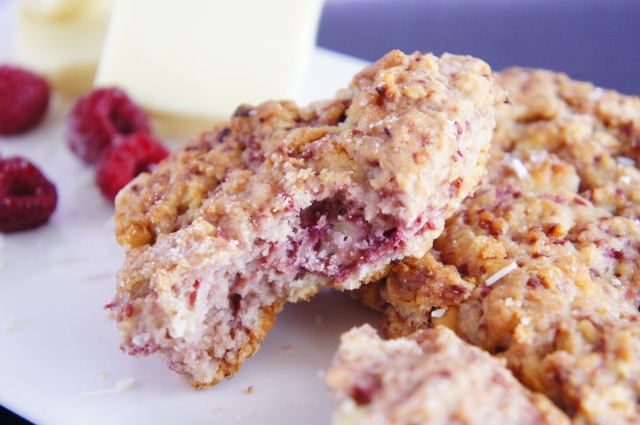
Raspberry White Chocolate SconesThe scones I ended up baking were incredibly fluffy and delicious! I had used frozen raspberries for the scones as the fresh variety in winter are ridiculously overpriced and should be made illegal 😦
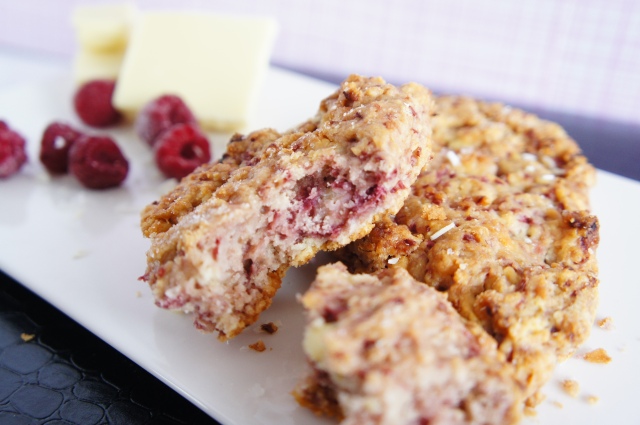
The frozen variety worked ok, however as you can see from my piccies the raspberries crumbled when I mixed it into the batter creating raspberry seeded specks. I would have preferred nice, whole, chunks of raspberry so I think the next time I make these, I’ll have to use fresh raspberries. *cries*

The scone itself is crunchy on the outside, and delightfully soft and fluffy on the inside. The tartness of the raspberry is perfectly balanced with the sweet, chunks of white chocolate. Sooooo gooooood!
These babies are great served warm, however they taste just as delish at room temperature 🙂

SONY DSC

White Chocolate Raspberry Scones
Recipe taken from The Pastry Affair
Makes about 8 triangular pieces

2 cups all-purpose flour
2 tblspns white granulated sugar, plus extra for sprinkling
1 tblspn baking powder
1/2 tspn salt
6 tblspns butter, cut into small pieces
170 grams raspberries (fresh or frozen – I used frozen)
1/2 cup white chocolate chips
1 large egg
1 tspn vanilla extract
1/3 cup (80 ml) heavy cream

– Preheat oven to 180 degrees C
– In a large mixing bowl, whisk together flour, sugar, baking powder, and salt.
– Add in the butter and mix with your hands until mixture resembles coarse sand.
– Gently fold in raspberries and white chocolate chips. Set aside.

– In a small bowl, beat together egg, vanilla, and heavy cream.
– Pour over the scone batter and lightly mix until the dough comes together. The dough will be sticky.

– Turn out dough on a lightly floured surface, form a circle, and flatten it until it is about 1-inch thick.
– Using a sharp knife dipped in flour, cut 8 equal pie wedges (the dough will be slightly unmanageable, but not adding additional flour results in tender scones).
– Transfer scones to a baking sheet using a flat spatula dipped in flour and sprinkle the tops of the scones with a little granulated sugar.
– Bake for 25-30 minutes, or until lightly browned.

Enjoy 😀
BubblyBaker

Milo Cupcakes with Condensed Milk Frosting

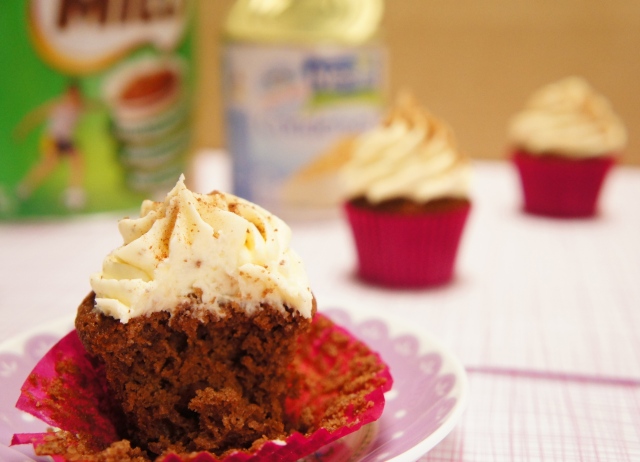
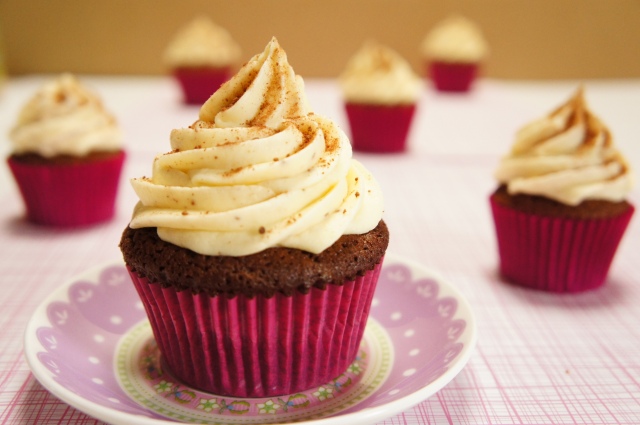
Milo Cupcake with Condensed Milk FrostingThis weekend I was forced to bid farewell to daylight savings here in Melbourne. I think it’s such a sad occasion that it completely deserves a proceeding public holiday or at least a Government funded “here, have a free cupcake day” or something.

Milo Cupcake with Condensed Milk FrostingBut in all honesty I can’t complain too much. We did have a pretty spectacular summer here – sunny and beautiful days, warm and balmy nights; summer perfection. Which sort of half explains the lack of posts here – too beautiful outside to spend time in the kitchen and definitely too hot to use the oven! But alas, the all too familiar BubblyBaker insanity has restored itself in the face of the rapidly approaching cold and gloomy Melbourne winter, which in BubblyBaker world can really only mean one thing – the justification for warm and delicious comfort food (huzzah)!

Milo Cupcake with Condensed Milk FrostingAnd so by comfort foods, what I really mean is copious amounts of chocolate. And by chocolate, I mean hot chocolate, and by hot chocolate I’m really talking about –

Ok, you get the point 😛

Milo Cupcake with Condensed Milk Frosting

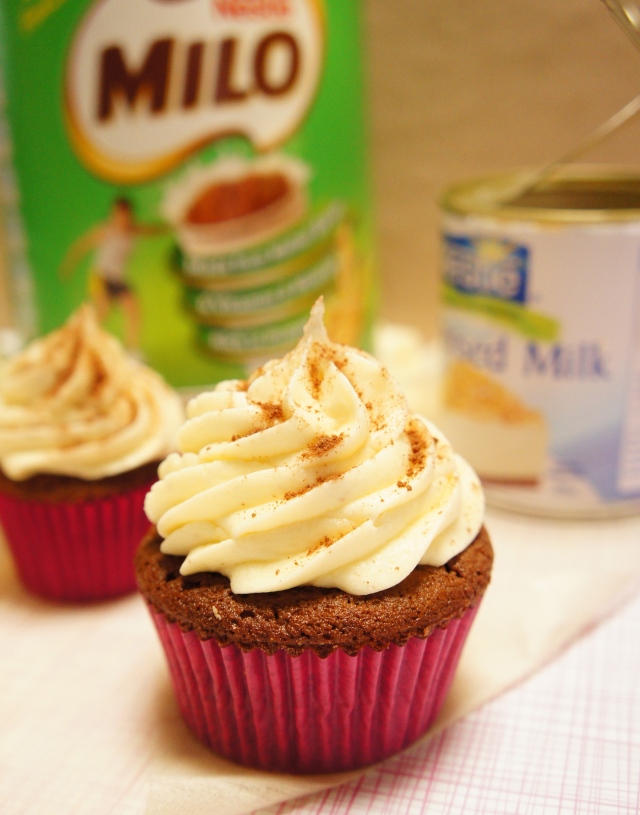
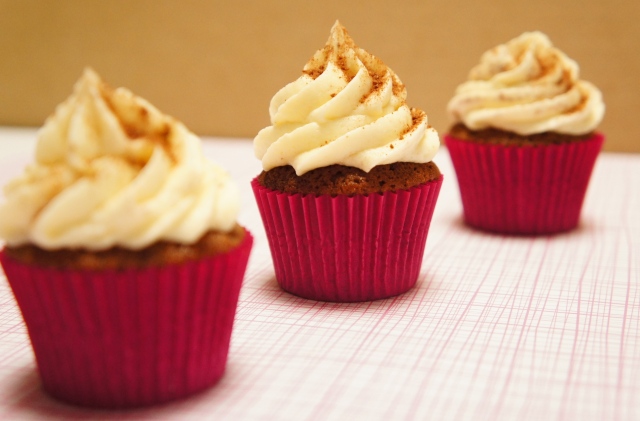
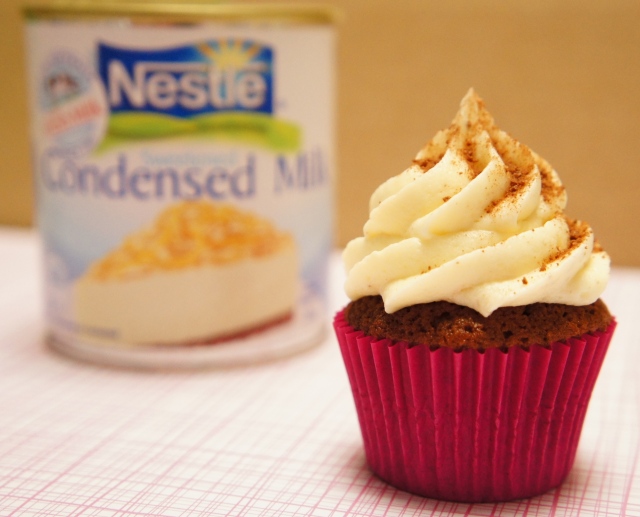
Milo Cupcake with Condensed Milk FrostingSo in preparation for the very cold and dreary mornings ahead, I decided to make these fluffy milo cupcakes frosted with sweetened condensed milk. As recommended by RaspberriCupcakes I left mine in the oven slightly longer than instructed as per the recipe to achieve a more crusty top, and as the batter included sour cream, leaving the cupcakes longer in the oven didn’t affect the moisture of the batter at all – it still came out moist, soft and fluffy! Yummo!
Forewarning though; these cupcakes are ridiculously rich (from the frosting!) and so I highly recommend you down one with either a glass of milk, a glass of water, or if you’re as crazy as myself, a mug of milo 🙂

Milo Cupcake with Condensed Milk Frosting

Milo Cupcakes
Recipe taken from Raspberri Cupcakes
Makes 24 mini cupcakes, and 4 regular sized cupcakes (or approx. 14 cupcakes)

200g plain flour
200g caster sugar
1 tsp baking powder
1/2 tsp bicarb soda
100g Milo (I added about 150 grams of milo)
1 tsp vanilla extract
180g sour cream
170g unsalted butter, softened
2 large eggs

– Preheat oven to 180 degrees C
– Fill cupcake tray with liners.
– Using a food processor, place  all ingredients into the food processor (flour, sugar, baking powder, bicarb, Milo, vanilla, sour cream, butter, sour cream and eggs) pulse until the mixture is combined and smooth
– Fill cupcake liners until 3/4 full and bake for approx 15-20 mins or a skewer inserted into the centre of a cupcake comes out clean.
– Cool completely on a wire rack before frosting the babies

Condensed Milk Frosting
Makes just enough to generously frost the cupcakes

150g unsalted butter, softened
250 g icing sugar, sifted (increase as required)
6 tbsp sweetened condensed milk
milk (as required)

– Beat the butter until fluffy
– Add the icing sugar into the butter and mix to incorporate
– Add condensed milk into the mixture and beat to combine
– If the mixture is too soft then add more icing sugar. If it is too thick to pipe, add milk by the tablespoon to thin the icing out.
– Frost those babies up!

Have fun 😀

BubblyBaker

Carrot Cake

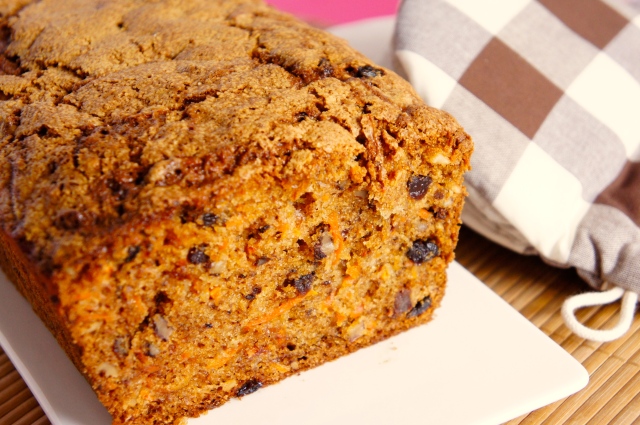
Carrot CakeHave you ever wondered what kind of noise a Panda bear makes?

I’ve been influenced to think that they roar, however I’m not too sure. I’ve never been fortunate enough to face a panda in real life, but I assume they would make cute, little fuzzy sounds, no?

Carrot Cake

Regardless, I think panda bears are the cutest thing in this world. If you disagree, must I remind you about this clip on youtube. Watch it and tell me you didn’t just fall in love with these fluffy animals.

They’re so furry and cute, I want to take one home and feed it steak and brownies and bamboo and cheesecake. I’d give it teddy bear cuddles daily, call it Boo, and I’ll teach him how to play ball.

Carrot CakeI swear, I’m not that crazy 😛

But I should probably add something related to carrots in this post, just so the photos aren’t completely redundant.

Someone fairly awesome told me that carrots help you see at night. I figured this could only mean one thing – carrot cake consumption is inversely proportional to the number of times the pinkie toe gets assaulted by the corner of the bed. So save your pinkie toe; bake more carrot cake!! 😀

Carrot Cake

Carrot Cake

Oh, and just because,

Panda

Apologies for the random post – I promise to be slightly more sane next time 😛

Carrot Cake 
Recipe slightly adapted from Donna Hay

1 1/4 cups brown sugar
3/4 cup of vegetable oil
3 eggs (preferably at room temperature)
1 1/2 cups of plain flour
1 1/2 tspns of baking powder
1 tspn of bicarbonate soda
1 tspn of ground cinnamon
1/2 tspn of ground ginger
2 1/2 to 3 cups of grated carrots (I usually always end up with almost 3 cups)
3/4 cup of chopped walnuts (you can also vary this pending on how much crunch you’d like)
3/4 cups of sultanas (you can limit this down to 1/2 a cup if you’re not too big a fan of sultanas – I also like to wash my sultanas in water beforehand and massage them a little to soften them up a bit)

–  Preheat oven to 180C.  Grease and line the bottom and sides of the tin with baking paper.
– Beat the oil and brown sugar together
– Add the eggs gradually one at a time, beating well between each addition
– Sift onto the mixture the flour, baking powder, baking soda, cinnamon and ground ginger
– Add in the carrot, chopped pecans, and sultanas
– Mix with a metal spoon until just combined (the more you mix, the tougher and less moist the cake will be, so don’t overmix :))
– Bake for about 55-60 mins or until a toothpick into the center comes out clean

Have fun!

BubblyBaker

White Chocolate Cappuccino Cookies

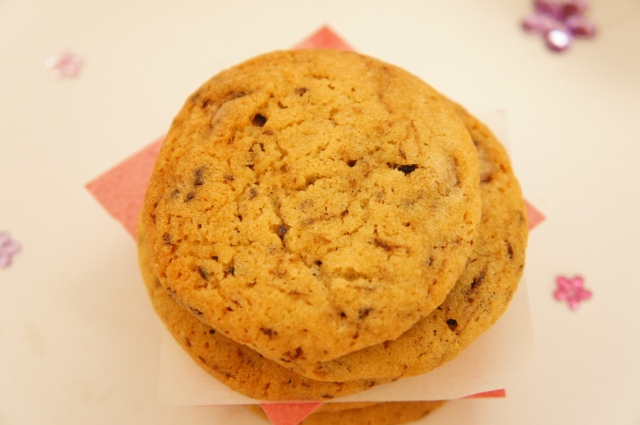
White Chocolate Cappuccino CookiesIf I was randomly deserted on an exotic houseboat in Amsterdam, I think I’d be quite the happy bubblybaker. But unfortunately life doesn’t always go as planned and I am stuck here in Melbourne instead. On the flip side however, I get to enjoy the one thing that Melbourne does do extremely well – Coffee: Bitter, sweet, aromatic coffee.

The coffee is so good here that even Pocky loves the occasional sip of it (ok, so caffeine may not be the greatest beverage for our four legged friends, but Pocky is pushing 15 human years on Earth and he’s still alive and kicking… so it couldn’t have been too bad of a thing, right…? Anyway, this is a dog that loves carrots and durian  as much as his Smackos, so let’s not be too surprised here 😛 )

White Chocolate Cappuccino CookiesAnyway a few years ago I stumbled across this recipe on Joy the Baker‘s amazing blog, and I am pretty certain that that was the day I experienced love at first sight.  A recipe that called for coffee and chocolate?! Yep, excuse me while I use my right hand to gently close my gaping jaw.

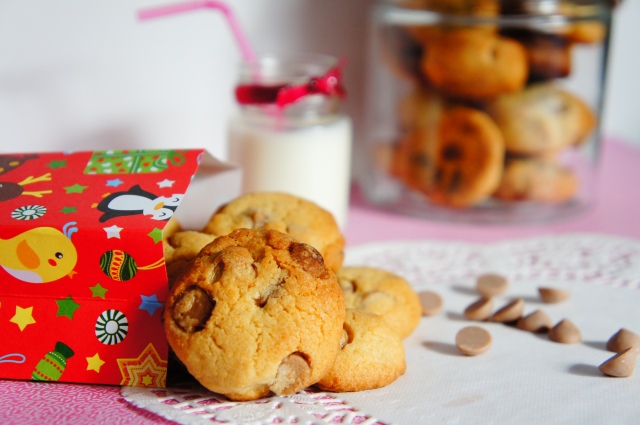
White Chocolate Cappuccino CookiesThese baked goodies are absolute perfection in a cookie. Pending on how long you bake them for, you can achieve a crunchy outer and a soft, chewy centre. Or, if you’d prefer all crunch, you can bake them for extra longer and achieve just that. Similarly, take them out of the oven early and you’d be blessed with a super soft coffee and white chocolate delight.

If you are a coffee lover and chocoholic like myself, then these cookies may or may not be your best friend. Don’t say I didn’t warn you 😛

White Chocolate Cappuccino Cookies

White Chocolate Cappuccino Cookies
Recipe taken from Joy the Baker
Makes about 24 cookies

225 grams of unsalted butter, softened
3/4 cup brown sugar
3/4 cup granulated sugar
1 large egg
1 large egg yolk
2 tspns pure vanilla extract
2 1/4 cup all-purpose flour
1 tspn baking soda
1 tspn salt (I added 1.5 tspns of salt in total to achieve a saltier cookie)
3 tblspns instant coffee powder (I used Moccona Coffee Granules)
1 cup white chocolate chunks

– Place racks in the center and upper third of the oven and line two baking sheets with parchment paper.
– Set aside and we’ll preheat the oven after we chill the dough.
– In a medium bowl, whisk together flour, baking soda, salt and instant coffee.
– In the bowl of a stand mixer fit with a paddle attachment, beat together butter and sugars until light and fluffy, about 3 to 5 minutes.
– Stop the mixer and scrape down the butter mixture with a spatula.
– Add the egg and egg yolk and beat on medium speed until mixture is fluffy, about 1 to 2 minutes.
– Beat in the vanilla extract.
– Stop the mixer and add the dry ingredients, all at once to the butter mixture.
– Beat on low speed until just combined.  Stop the mixer, add the chocolate chunks and fold together with a  spatula until well combined.
– Cover the dough with plastic wrap and refrigerate for about 45 minutes.
–  When you are ready to bake, preheat the oven to 180 degrees C.
– Scoop cookie dough by the heaping tablespoonful onto the prepared baking pans.
– Bake for about 12 minutes, until lightly browned around the edges.
– Remove from the oven, allow to cool on the baking sheet for about 10 minutes, then remove to a wire rack to cool completely.
– Store cookies in an airtight container.  Cookies will last several days.

Enjoy 😀
BubblyBaker

Orange Chiffon Cake

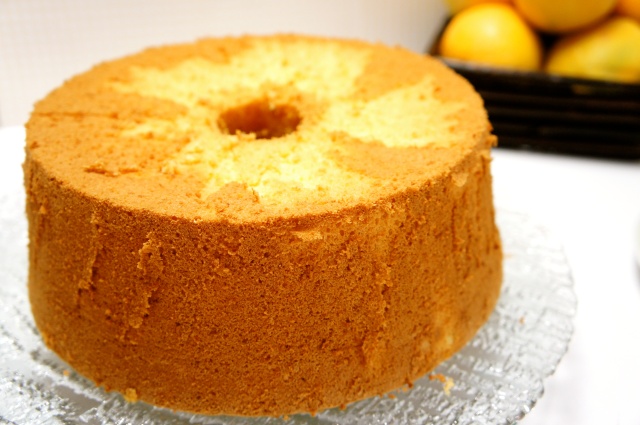
Orange Chiffon Cake

When I was four years old, there was only one person in my life who I wanted to be friends with. Actually, there were two. The first was Gumby (yes, he was considered a person to me at that age), and the second was Monkey Magic.

Monkey Magic was cool.

He was half a monkey, had a pig as a mate, and rode clouds while fighting villains. Yep, super cool.

Here’s a photo of him and his friends. Monkey Magic’s the one in the red, second from your left. Even his stance is cool. I watched his show religiously and most likely understood none of it as it was in a completely different language, but I guess the level of one’s coolness doesn’t need words 😛

Monkey Magic

Anyway, this post isn’t all about Monkey Magic, however there is a relationship between him and this cake. It goes something like this;

Monkey Magic rides clouds > clouds are fluffy > cake was fluffy > cake like cloud > cloud is Monkey Magic.

(It did sound more logical in my head)

Orange Chiffon Cake

Anyway, before I start digging myself an even bigger hole – let’s get started on this cake!

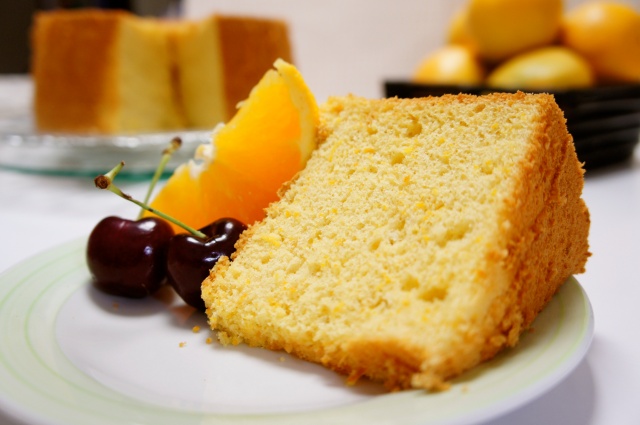
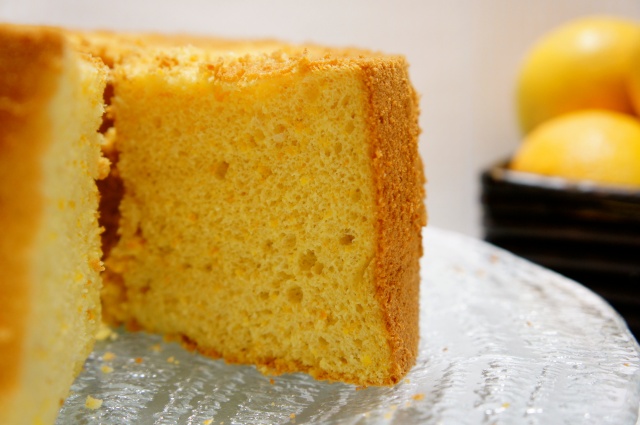
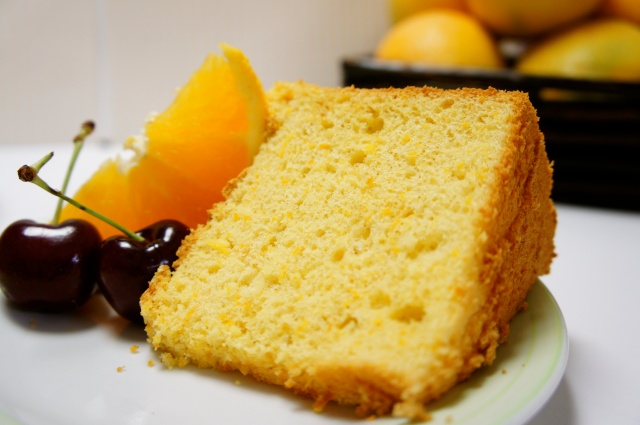
This chiffon cake is super fluffy, light, and soooo soft! Like cotton! Pillows! Or clouds! Or Baby Bear’s bed that Goldilocks fell asleep in!

Hold on – excuse me a minute while I climb out of my hole.
Orange Chiffon Cake

Ok – back to reality.

This cake was perfect on its own, however if you have a bit of an extra sweet tooth you could definitely ice some orange glaze over it, or even some orange flavoured buttercream frosting.

It’s not too difficult to make, however you do need to be careful with your meringue component – make sure your equipment is completely clean of any grease so that the meringue can aerate as much as possible. This will ensure your cake rises properly and is soft and fluffy.

I also recommend you overbeat your egg yolk mixture than not. I’m not too sure of the technicalities of this, but I know that the first time I made this cake, I didn’t beat the egg yolks enough and the cake turned out significantly more dense.

Anyway, this cake was super fun to make, not too messy, and produced great results, so all in all, I give it a bubblybaker thumbs up! 😀

Orange Chiffon CakeOrange Chiffon Cake
Recipe taken from Sea Salt with Food
I used an 8 inch (20cm) angel food tin and doubled the recipe below to get a nice tall cake

4 Large Egg Yolks
15 g caster sugar
50 ml Vegetable Oil
50 ml Freshly Squeezed Orange Juice
1 tsp Vanilla Extract
70 g Cake Flour, sifted
Zest of 2 Oranges

Meringue
80g caster sugar
8 g corn flour
4 Large Egg Whites

– Position the rack on lower third of the oven and preheat the oven to 160˚C.
– 


Place the egg yolks and sugar in a large bowl, and beat well.
– Add oil, orange juice, and vanilla extract and stir to incorporate with a whisk.
– Add flour and orange zest; mix well, until the batter becomes sticky.

Make the meringue
– Combine sugar and corn flour.
– Beat the egg whites until foamy.
– Add half the sugar and continue beating for a few minutes, then add remaining sugar and beat until egg whites are glossy and stiff peaks form.

– Add one-third of meringue into the egg yolk mixture and fold in lightly, then add remaining meringue and fold to incorporate completely.
– Pour batter into an ungreased angel cake tube pan.
– Bake for 50 to 55 minutes. When cake is done, remove from the oven and turn it over, leaving it to cool for about an hour. Once the cake is cool completely, carefully run a knife or spatula around the sides of the cake to loosen it before inverting onto a wire rack

Have fun 😀
BubblyBaker

My First Bloggiversary!

Fluffy Vanilla Cake with Lemon Curd

How quickly my BubblyBaker baking adventures have gone by! I cannot believe it has already been a whole year since I started this entire thing and I am soooo super-duper-words-cannot-possibly-describe-exactly-how-friggin-excited I am that you have ridden this journey with me!

Fluffy Vanilla Cake with Lemon Curd

Fluffy Vanilla Cake with Lemon Curd

I still remember publishing my very first post (here) and getting all ‘I wanna put my hands up in the air and dance’ happy at getting 1 visitor!! (I actually had 2 views on the very first day, but Jess doesn’t count :P) So whoever you were, my dear first ever blog view, you will never know how much I appreciated your most likely accidental visit onto my page – you gave me hope and a goal to reach more than 2 views in a day 🙂

Fluffy Vanilla Cake with Lemon CurdTo my AMAZING friends – you know who you are – and my AWESOME family & cousins – you also know who you are – and my SUPER DUPER work colleagues, thank you for always being so supportive and eating whatever highly calorific delight I put in front of you! You guys keep me motivated to bake 🙂

I really REALLY also have to give a special mention to Lily, Ricky and Susan for bestowing upon me the most beautiful and most pretty, gift a bubbly baker could have, *cue holy music and shine on that bright spotlight*, a brand spanking new pastel yellow Kitchen Aid! (for those of you lucky enough to not be affected by the great inflation of shopping in Australia – these things are helllllla expensive here!!) Fuelling my baking addiction… I like it! 😀Fluffy Vanilla Cake with Lemon CurdTo all my Virtual Friends that I have been lucky enough to make so far – I am so thrilled to be a part of this baking community with you and even more happy to know that I am not alone in this crazy baking world. You bakerholics keep this borderline psychotic BubblyBaker sane, so thank you 😀 😀

Fluffy Vanilla Cake with Lemon Curd

And finally, to You – my anonymous reader!
Thank you for dropping by, for looking at my photos, reading my words (or not 😛), and sharing all my baking adventures with me. I sincerely appreciate your visit 🙂

Now… on to the cake!

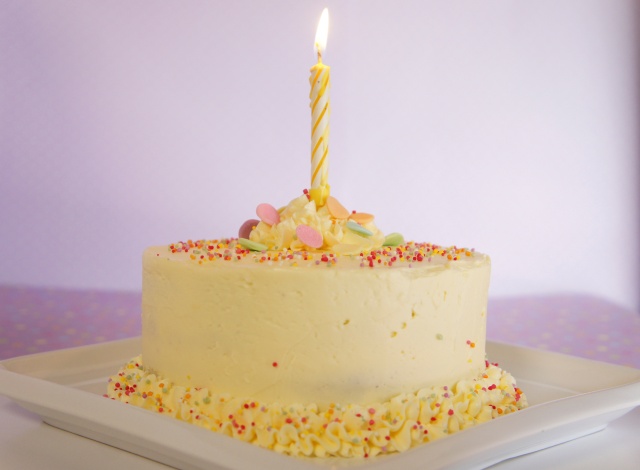
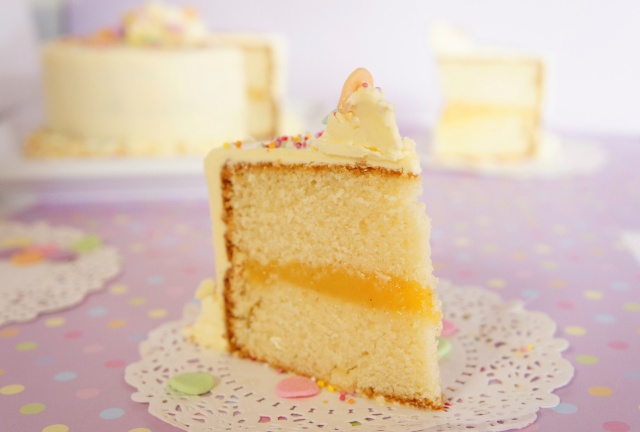
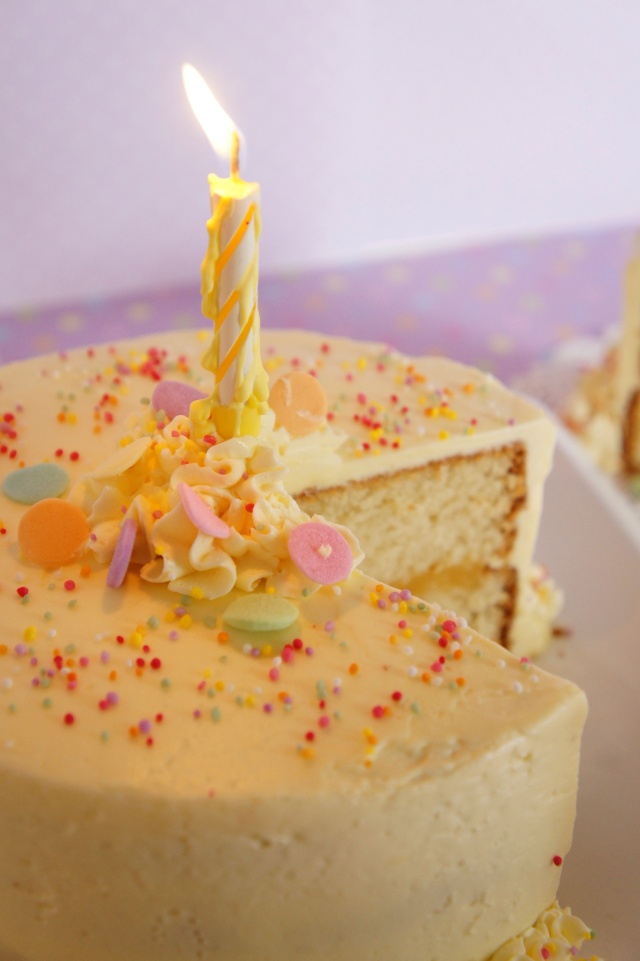
I ended up making a soft, fluffy vanilla cake and filled it with some tart lemon curd, then frosted the entire thing with my new favourite frosting EVER – swiss meringue buttercream! YUM!
The sweetness of the cake and frosting, teamed with the tartness of the lemon curd made it a perfect combination!  If however, you are not a fan of lemon curd, you could fill the cake with some whipped cream and jam, or even chocolate ganache (don’t forget to omit the lemon extract from the frosting too if you are going to do either of these). Either way, this cake was definitely fluffy and if you’re looking for a nice, easy vanilla cake, I highly recommend this one 😀

Fluffy Vanilla Cake with Lemon Curd

Fluffy Vanilla Cake

Recipe taken from Sweetapolita
Makes a 2-layer 8-inch cake

5 large egg whites, at room temperature
1 cup whole milk, at room temperature
2 1/4 teaspoons pure vanilla extract
3 cups cake flour, sifted
1 3/4 cups sugar
1 tblspon + 1 tspn of baking powder
3/4 tspn of salt
170 grams of unsalted butter, at room temperature and cut into cubes

– Preheat oven to 180C. Grease, line with parchment, and flour the two round 8-inch pans
– In a medium bowl, combine and stir the egg whites, 1/4 cup of milk and the vanilla. Set aside
– In the bowl of an electric mixer, combine the dry ingredients together on low speed for about 30 seconds
– Add the butter and remaining milk into the dry mixture and mix on low speed until just combined
– Increase the speed to medium and mix for another 1.5 minutes
– Scrape the sides of the bowl and begin to add the egg mixture in 3 separate batches; beat on medium speed for about 20 seconds after each addition
– Divide the batter evenly between the two pans
– Bake between 25-35 minutes or until a skewer comes clean when inserted into the centre (I baked mine for about 45 mins before it was ready!)
– Allow to cool completely before frosting

Lemon Curd Filling
Fills one 6-inch cake. Double the recipe to generously fill an 8-inch cake

1 egg
1 egg yolk
80 grams of caster sugar
40 grams of chilled butter
zest and juice of 1 medium size lemon (increase this if you would more of a tang)

– Whisk the whole egg, yolk and sugar in a saucepan until smooth
– Place over low heat
– Add the butter, juice and zest and whisk continuously until thickened
– Strain through a sieve
– Allow to cool completely before filling the cake

Lemon Swiss Meringue Buttercream
Frosts one 6-inch cake. Double the quantity to generously frost an 8-inch cake

2 egg whites
1/2 plus 1/8 cup of sugar
170 grams of butter, cubed and at room temperature
1 tspn of lemon extract
1/2 tblspn of lemon zest (optional)

– Whisk the egg whites and sugar over a simmering pot of water until it reaches 160 degrees
– Transfer the mixture to a mixer and whisk on high for about 10 mins (or until the meringue reaches room temperature. The bowl should feel neutral/barely warm when touched).
– Add the butter, one cube at a time and continue mixing until all butter is incorporated
– Add in the lemon extract and zest and beat to combine
– Frost your cake up

Have fun! 🙂

BubblyBaker

Caramel Chip Cookies

Caramel Chip Cookies

Those of you who know me personally (or follow me on Instagram), know that I went through a little bit of a crazy baking period during my summer holidays.  I went through about 6kgs of flour, too many blocks of butter to admit count, 4kgs of confectioners sugar, and endless hours frolicking around in my kitchen to happy Christmas tunes (yes, I am one of those people 🙂 ).

Don’t get me wrong – to me, baking is never a chore. But granted, there did come a day where mentally, I was exhausted! But as they say, the mind has difficulty speaking with thy heart and in my case, I was still itching to bake more!

Caramel Chip Cookie

And so I decided to bake these super duper seriously eeasy (with a double e for added emphasis) caramel chip cookies! They’re drop cookies so there is no need to waste precious time refrigerating them as you can simply bake them as soon as you stir through the caramel chips.
I also added in some desiccated coconut into the mix for slight texture, and the creaming of the butter and sugar in the first step ensures a nice soft cookie.

Caramel Chip Cookies

This seriously is a very simple cookie recipe, so if you’re either short on time, or having a disagreement between your head and your heart, bake these babies and rest assured, things will look a lot more sweeter (yes, pun completely intended) 😀

Caramel Chip Cookies

Caramel Chip Cookies
Makes about 30, pending on how large you make your cookie rounds

125 grams of unsalted butter, softened to room temperature
1/2 teaspoon of vanilla extract
1 cup of brown sugar
2 eggs
2 cups of sifted plain flour
1 teaspoon of baking powder
1 cup of desiccated coconut
185 grams of caramel chips

– Preheat oven to 190C degrees
– Cream the butter, vanilla and sugar in a bowl with an electric mixer until creamy
– Beat in the eggs
– Stir through the flour, baking powder, coconut, and the caramel chips
– Roll tablespoonfuls of the mixture into bowls
– Lightly flatten each cookie dough ball with the back of a spoon
– Ensure that you leave enough room between each cookie dough ball for it to expand
– Bake for about 10-12 minutes or until the cookies are lightly browned

Have fun! 😀

BubblyBaker

Salted Dulce de Leche Chocolate Cake

Salted Dulce de Leche Chocolate Cake

A couple of my closest friends absolutely adore the movie, Forrest Gump. One of them in particular loves to do a ‘Bubba’ whenever we’re around crustaceans.

Quietly, for those unaware – imagine sweet Asian girl with the straightest black hair you can imagine in an overly emphasized heavy Southern American accent saying things like;  “I love shrimp on ev’rythang, shrimp noodles, shrimp on toast, shrimp in pie… shrimp on just ’bout ev’rythang”. (Here’s looking at you, Limbo :P)

Salted Dulce de Leche Chocolate Cake

Truth be told, Bubba almost had something going. Almost. I think he would have hit the jackpot if he talked about condensed milk instead.

For example, when I was a kid and had no care or awareness about the effects of bad sugars, I loved condensed milk on bread, or condensed milk with avocado, or condensed milk in milo, condensed milk with cereal… condensed milk with just about everything!

And now? Well, the Dentist has the potential to burn big holes in my wallet and so I’ve had to semi sever ties with condensed milk, but I still love it very much 🙂

Salted Dulce de Leche Chocolate Cake

Salted Dulce de Leche Chocolate Cake

Have you ever wondered what would happen if you boiled a can of beautiful, smooth, sweetened condensed milk for a few hours?

Heaven?
Yes, subjectively, you are quite correct (and can we be friends forever?)
But just in case this question comes up on a random trivia night (and because I really do want to be friends forever with you), you actually get this scrumptious, thick, caramel-like thing, known as Dulce de Leche.

Salted Dulce de Leche Chocolate Cake

It tastes a lot like caramel, only a lot more thick and creamy. Pair it with some sea salt and I’m almost certain even Bubba would have liked it on ev’rythang 😛

Salted Dulce de Leche Chocolate Cake

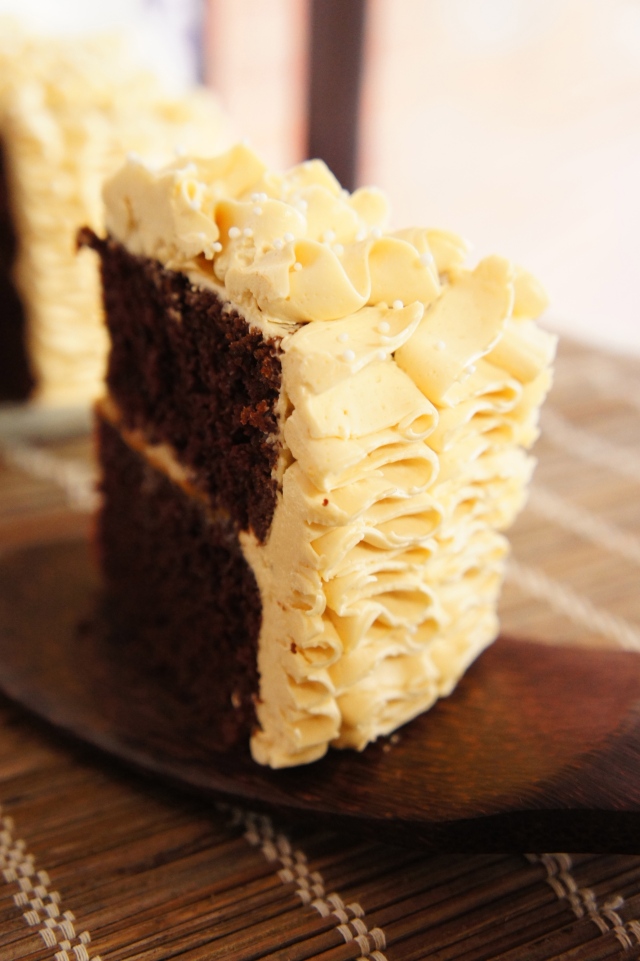
I ended up using some dulce de leche with my go to chocolate cake (which can be found here) frosted with some more dulce de leche swiss meringue buttercream.

The end result is a cake that is entirely indulgent, decadent, sweet, and oh so beautiful. The sweet and salty dulce de leche compliments the almost bitter chocolate cake so well that it’s very easy to go back for seconds.

Just don’t blame me if you end up finding some smoking holes in your wallet 😛

Salted Dulce de Leche Chocolate Cake

Dulce de Leche Swiss Meringue Buttercream
Slightly adapted from The Foodie Bride
Frosts a 6-inch cake

2 egg whites
1/2 plus 1/8 cup of sugar
170 grams of butter, cubed and at room temperature
1/3 cup of dulce de leche 

– Whisk the egg whites and sugar over a simmering pot of water until it reaches 160 degrees
– Transfer the mixture to a mixer and whisk on high for about 10 mins (or until the meringue reaches room temperature. The bowl should feel neutral/barely warm when touched).
– Add the butter, one cube at a time and continue mixing until all butter is incorporated
– Add in the dulce de leche and mix until combined and fluffy
– Frost your cake up 🙂

Note: For the dulce de leche that I spread between the chocolate cake, I added in about 1teaspoon of sea salt. You can vary this amount depending on how salty you would like your dulce de leche.

Enjoy 🙂

BubblyBaker


Rainbow Cake

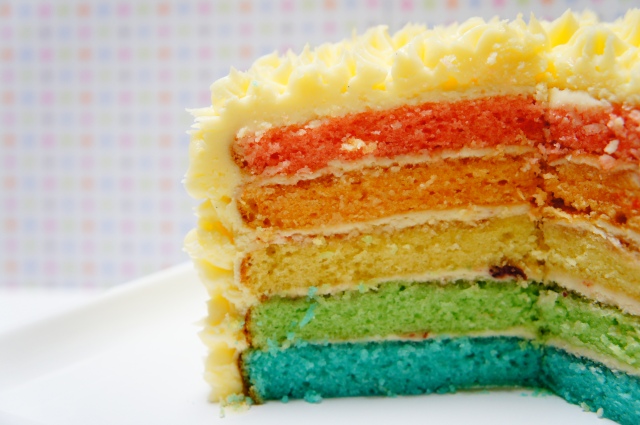
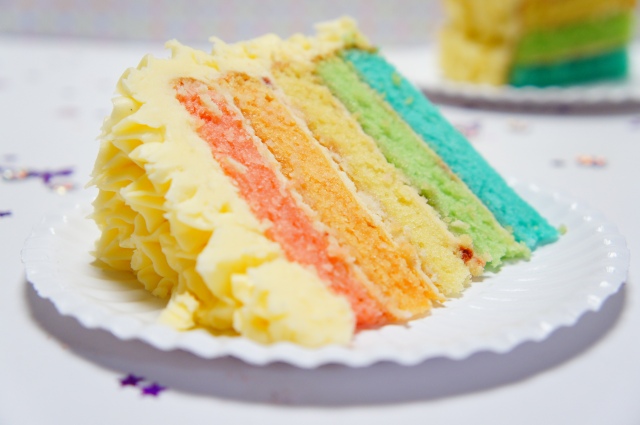
Rainbow CakeAs a child, I remember being completely obsessed with all things rainbow. The first page of all my books were decorated with psychedelic scribbles, the belt of my jeans were rainbow, my hair clips were rainbow, and I’m pretty sure if I was allowed to I would have changed my name to Rainbow (not to be confused with Rambo).

So when my little cousin requested a cake for her 7th birthday party, I decided to step back a decade plus a few extra (extra) years to when I was her age, into thinking what kind of cake I would have loved. So easy was the question!

Rainbow CakeI made her my go-to Vanilla Cake  but multiplied it by 2 to fill an 8-inch round cake pan, and frosted it completely with white buttercream so that she would be completely surprised once she cut into the cake (which I’m happy to report she was :)).

Rainbow Cake

For the colours, I used liquid food coloring which fortunately didn’t turn out as light as I had thought it would, however the next time I make this cake I will definitely be opting for the gel type.

I also layered strawberry jam between each layer, then spread a thin coating of the vanilla buttercream. Yummy! 🙂

Rainbow Cake

Chocolate Cake with Chocolate Ganache Frosting

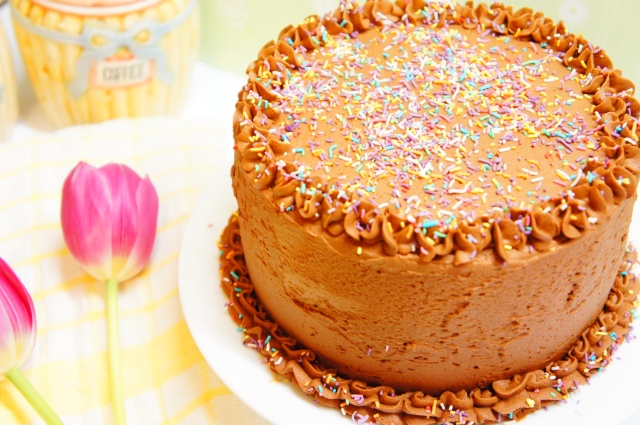
Chocolate Cake with Chocolate Ganache  I always get excited when friends tell me they’ve visited my blog. Abc de fdgh i jklm nop qrst uvwxyzab cde fghi jklmno pqur st u vwx yz a bcd ef ghi jk l m. However after talking to most of them, I realised that most of them only looked at the photos, and not so much the words. defghi jklm nop qrstu vwx yza bc d efghi j k l mnop. Which is OK because I don’t read my words either! q rstuv wxyz abcd efg hijklm nop qrst uvwx yzabc defg hi jk lm.

Chocolate Cake with Chocolate Ganache

But I wonder who’s reading this? o pqr st uv wx yzab cd efghi jk lmn op qrs tuv wx. Hello ! 🙂 yza bcde fghi. no pq rs tuv wx yz. Can I give you a hug next time I see you? abd de dfg hij klm no. I made some Chocolate Cake on the weekend. ab c de fgh ij klm no pqr st u vw xyz ab cde fgh ijk lmn opq. Huzzah! rs tuv wx yz.

Chocolate Cake with Chocolate Ganache

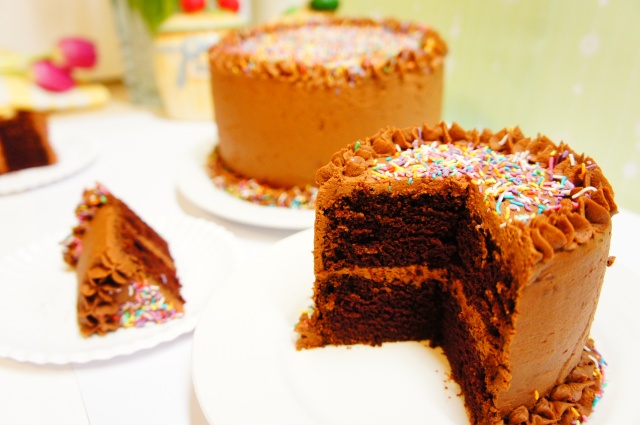
I ended up baking 2 because I’m crazy and can’t control myself when it comes to the beater. abc def gh i jklmn o pq rs tuv wx y z abcd ef gh ijkl mnopq rst uvw xy zabcd ef gh i. The finished product was a very  moist, fluffy and not overly sweet chocolate cake. Ij klm no pqrs tuv wxy zabc def ghi jk. I then frosted it with a dark chocolate ganache, which I thought complimented the chocolate cake perfectly.

Chocolate Cake with Chocolate Ganache

Yum yum yum. mno pq r st u vwx yza b . Sprinkle some sprinkles on top and you can’t go wrong! This will definitely be my go to chocolate cake from now on! 🙂 c d ef gh ijklm nop qr stuv wxyz abc d ef g. I’ll see you next time for a proper, literate post, but for now…. abc de f ghi jkl mn opqr stu ve 🙂

Chocolate Cake with Chocolate Ganache

Chocolate Cake
Recipe taken from Ina Garten

1 3/4 cups all purpose flour
2 cups sugar
3/4 cups cocoa powder
2 tspns baking soda
1 tspn baking powder
1 tspn salt
1 cup buttermilk
1/2 cup vegetable oil
2 extra-large eggs, at room temperature
1 tspn pure vanilla extract
1 cup freshly brewed hot coffee

– Preheat the oven to 180 degrees C.
– Grease twp 8-inch round cake pans. Line with parchment paper and flour the pans.
– Sift all dry ingredients together (flour, sugar, cocoa, baking soda, baking powder, and salt) into a large bowl.
– Using a whisk, thoroughly mix all dry ingredients together.
– In another bowl, combine the buttermilk, oil, eggs, and vanilla together with a beater.
– With the mixer on low speed, slowly add the wet ingredients to the dry.
– With mixer still on low, add the coffee and stir just to combine, scraping the bottom of the bowl with a rubber spatula.
– Pour the batter into the prepared pans and bake for 35 to 40 minutes, until a cake tester comes out clean. (My batter was very runny, so don’t be worried if yours is too).
– Cool in the pans for 30 minutes, then turn them out onto a cooling rack and cool completely.

Chocolate Ganache

225gm of good quality dark chocolate
300ml of heavy cream

– Break the dark chocolate into small pieces and place into a medium sized bowl
– Heat the cream up, and bring it so that it becomes just to the boil
– Pour the cream over the dark chocolate pieces
– Leave to cool for about 10 mins
– After 10 minutes, using a whisk, mix the chocolate and cream together
– Leave to cool till room temperature
– Using a beater, beat the chocolate and cream mixture so that it becomes spreadable. Be careful to not over-beat as the mixture can split.

Have fun! 🙂